22 July, 2015

Arduino: output multiple numbers to a digital LED display

In the previous article I was describing how to output number into this LED display:

But it is much interesting to display multiple numbers on a single LED module (for example: temperature and moisture or distance and time). It is pretty simple to write it in C.

Like in a previous example DIN, CS and CLK are connected with arduino through these pins: 7, 6 and 5. Here is the working prototype:

Output 2 numbers to led display

In this example are implemented two counters: 2-digits, and 5-digits. The first counter increments from 0 to 99, and then resets on reaching the maximum values. The second - reduces from 99999 to 0, and resets after the zero. In each cycle a digital display shows both numbers at the same time, with an empty place as a separator between them.

Code sample:

#include <LedControl.h>

const int DIN_PIN = 7;
const int CS_PIN = 6;
const int CLK_PIN = 5;

LedControl display = LedControl(DIN_PIN, CLK_PIN, CS_PIN);

void setup() {
  display.clearDisplay(0);
  display.shutdown(0, false);
  display.setIntensity(0, 10);
}

void displayString(const char *chars8) {
  display.clearDisplay(0);
  for (int i = 0; i < 8 && chars8[i] != 0; i++) {
    display.setChar(0, 7 - i, chars8[i], false);
  }
}

int counter1 = 0;
long counter2 = 99999;

char chars[9] = {};

void loop() {
  snprintf(chars, 9, "%-2d %5ld", counter1, counter2);
  displayString(chars);

  counter1++;
  counter2--;

  if (counter1 > 99) {
    counter1 = 0;
  }

  if (counter2 < 0) {
    counter2 = 99999;
  }

  delay(250);
}

In this example two numbers are packed into the char array and then displayed via the displayString() function. I use snprintf() function for this; it is much safe then sprintf().

The first number is aligned on the left edge of the display, the second - on the right.

This code requires LedControl library.

Set of components used in this example:

20 July, 2015

Arduino: output number into digital LED display MAX7219

There are some LED modules for Arduino to display numbers.

For example, this LED display with 8-digits based on the chip MAX7219:

It connects to the Arduino board via five pins:

  1. DIN - data in
  2. CS - chip select
  3. CLK - clock pulse source
  4. GND
  5. 5 V

In this example all elements are connected in this way:

Output number to led display

Here DIN, CS and CLK are connected with pins 7, 6 and 5.

Arduino site has a big LedControl article related to control over the LED matrix. But it doesn't contain a sample that shows how to output whole number.

The code below implements a simple counter, which increases its value once per second and displays it on a digital display:

#include <LedControl.h>

const int DIN_PIN = 7;
const int CS_PIN = 6;
const int CLK_PIN = 5;

LedControl display = LedControl(DIN_PIN, CLK_PIN, CS_PIN);

void setup() {
  display.clearDisplay(0);
  display.shutdown(0, false);
  display.setIntensity(0, 10);
}

void displayString(const char *chars8) {
  display.clearDisplay(0);
  for (int i = 0; i < 8 && chars8[i] != 0; i++) {
    display.setChar(0, 7 - i, chars8[i], false);
  }
}

int counter1 = 0;
long counter2 = 99999;

char chars[9] = {};

void loop() {
  snprintf(chars, 9, "%-2d %5ld", counter1, counter2);
  displayString(chars);

  counter1++;
  counter2--;

  if (counter1 > 99) {
    counter1 = 0;
  }

  if (counter2 < 0) {
    counter2 = 99999;
  }

  delay(250);
}

In this code I use displayNumber() function, that writes value for each decimal digit into the appropriate LED segment.

This code requires LedControl library.

Electronic components used in this example:

01 February, 2015

How to open sas7bdat file

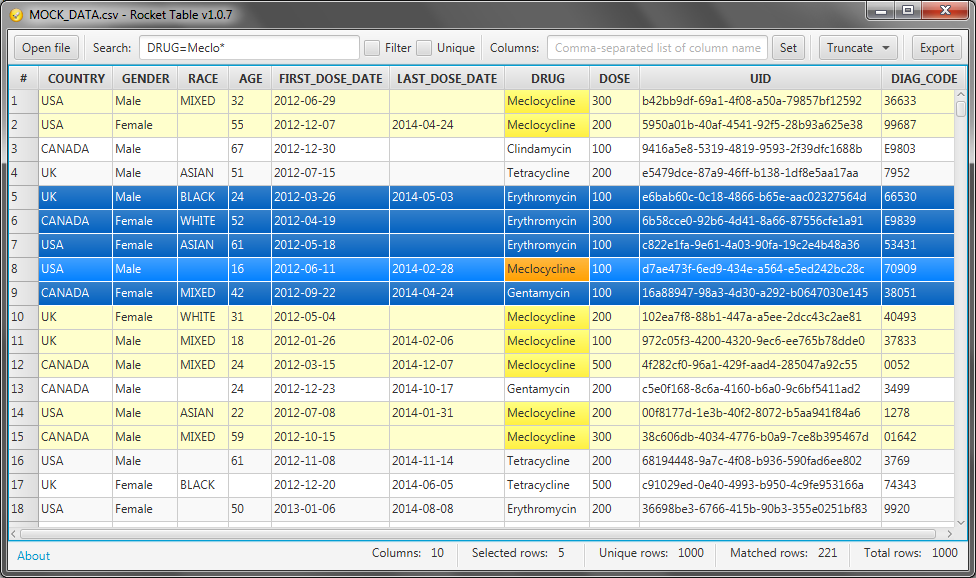
I found Rocket Table application for this purpose. It doesn't require any SAS software, it's free and easy to use.
SAS Table Explorer allows you to open file in the .sas7bdat format and shows it as a table.

Main features of this application are:
  • Search over the whole dataset, or by specific columns
  • Highlight search results
  • Wildcard search
  • Truncate the analyzed dataset (to matched or selected rows)


Anyway this is the most compact tool for opening sas files.

07 January, 2015

How to close Java splash image after the application starts

There is a very easy way to get Splash screen in Java application.
With a "-splash:imagepath" command line parameter, or with "SplashScreen-Image: imagepath" manifest parameter.

But when an application is started, Java still shows this image (below the application layer, but it visible when you switching between the applications), until the application is finished. Strange behavior, but it is possible to close this kind of splash screen.

With these lines of code:
import java.awt.SplashScreen;
...
SplashScreen splashScreen = SplashScreen.getSplashScreen();
if (splashScreen != null) {
    splashScreen.close();
}

How to create a file extension association with the program in Windows

Assume that you have a program named "table-explorer.exe".
And you want to open all ".csv" and ".sas7bdat" files using  this program by default in Windows.

First you need to create a file extension association with the program via these commands:


reg add HKCU\SOFTWARE\Classes\.csv /d "table-explorer" /f
reg add HKCU\SOFTWARE\Classes\.sas7bdat /d "table-explorer" /f


And then register the application:


reg add HKCU\SOFTWARE\Classes\table-explorer\shell\open\command /d "\"C:\Path\to\table-explorer.exe\"" /f